Create ER:LC jobs
Create a paid ER:LC job, choose its route, and decide who may start it.
Before you begin
- Connect CoreRP to the intended ER:LC private server and start that private server.
- Configure the CoreRP economy and bank.
- Decide whether the route should use buildings or a custom map area.
- Each member who will use the job needs an active citizen, the exact Roblox username used in ER:LC, and a primary bank account.
Create the job
-
Open Module settings → ER:LC Extension → Jobs.
-
Select Add job.
-
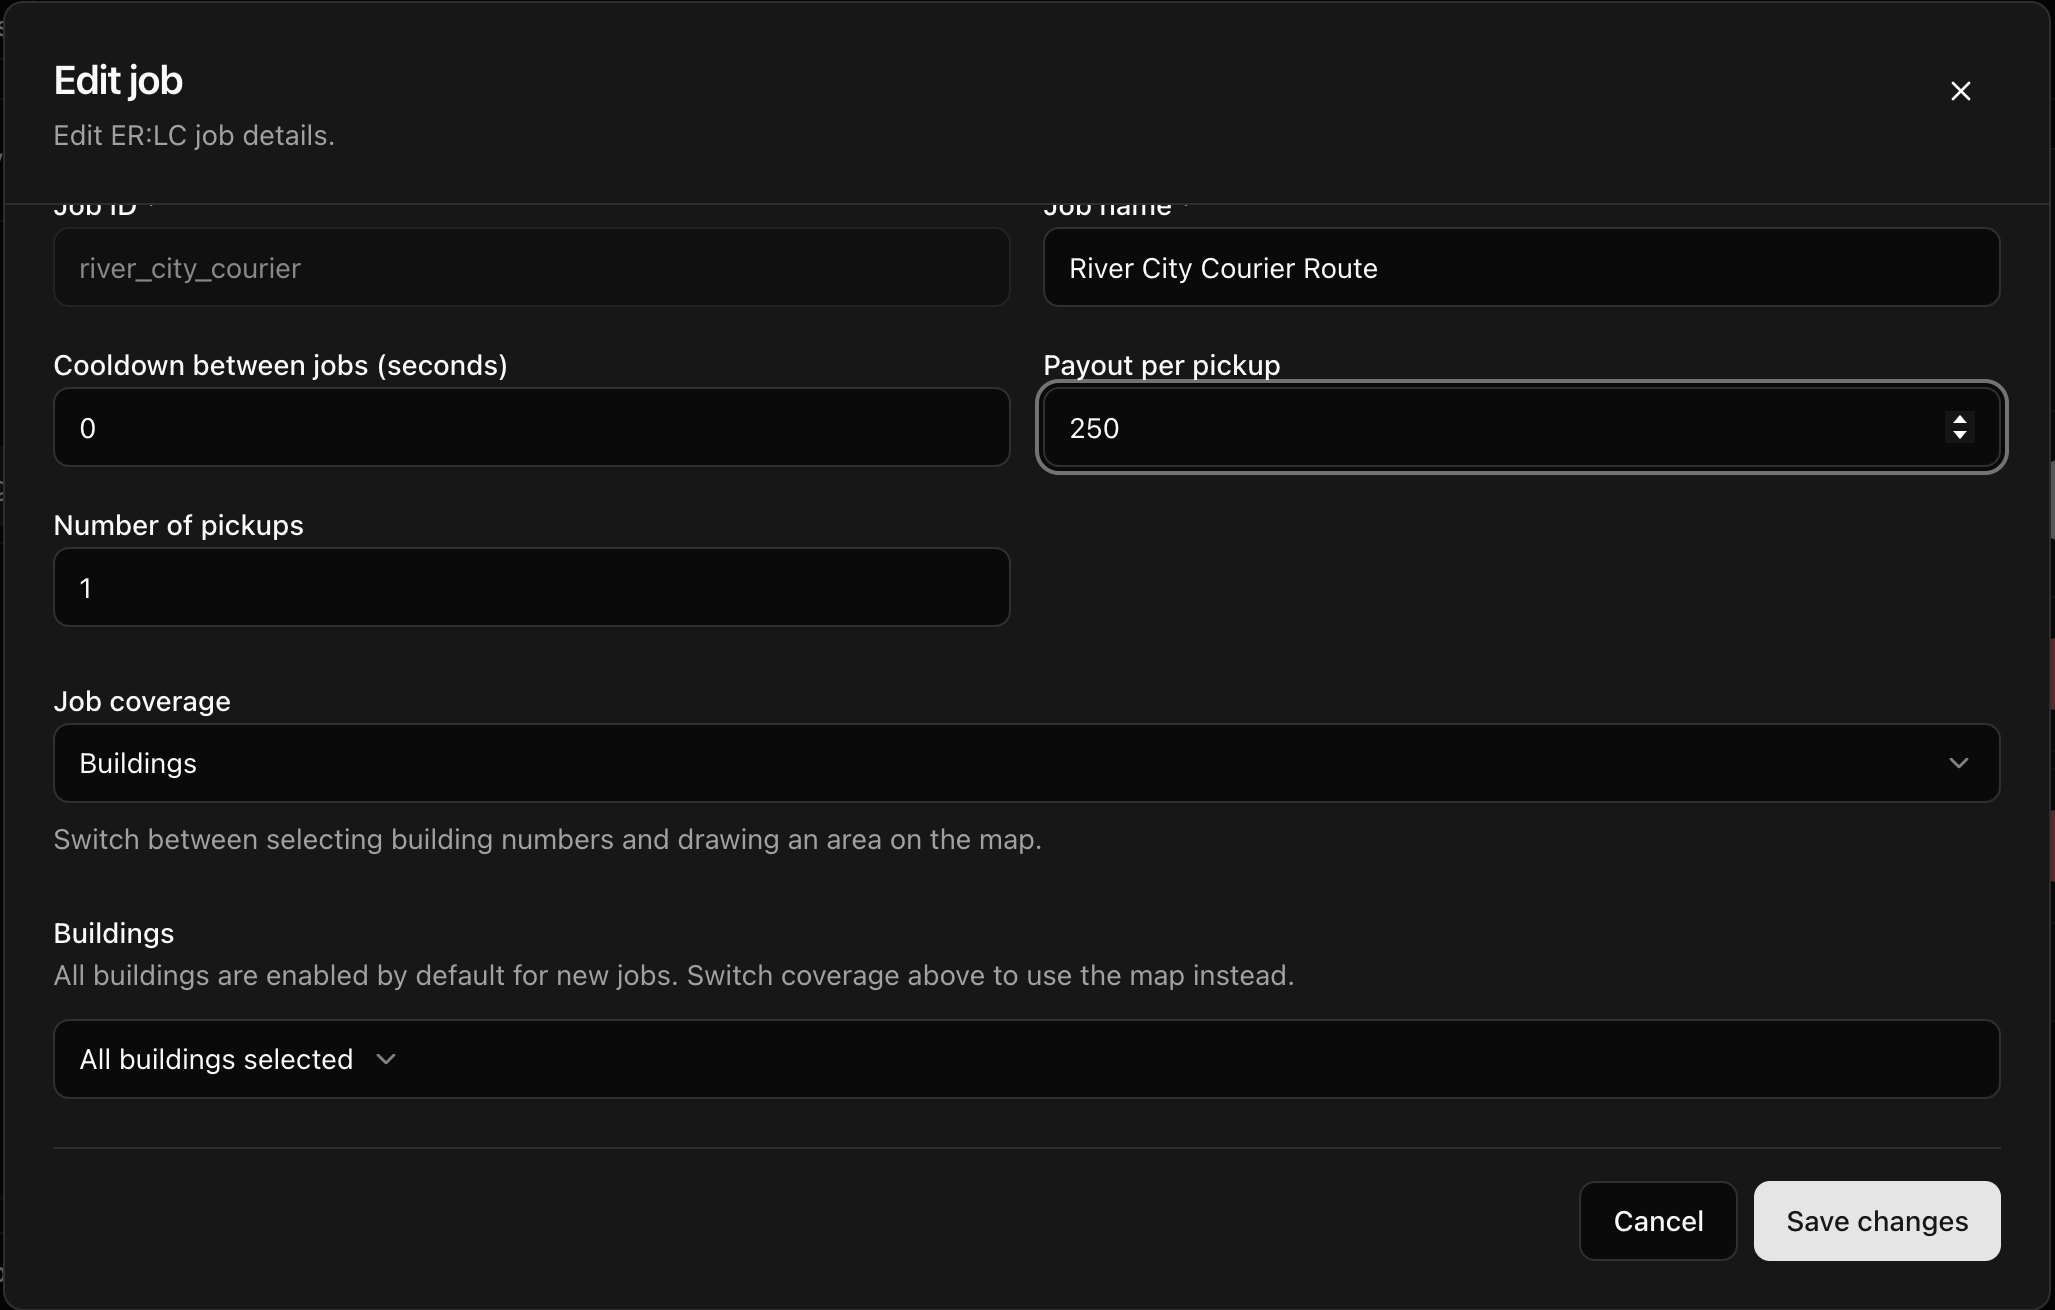
Enter a required Job ID and Job name. For example, use
river_city_courierand River City Courier Route. The ID cannot be changed later. -
Enter Cooldown between jobs (seconds) using
0or more. -
Enter Payout per pickup and a Number of pickups of at least
1. For the example route, use one pickup and a$250payout. -
Under Job coverage, choose:
- Buildings — select at least one ER:LC building.
- Area on map — draw an area with at least three points and set Area limit threshold to at least
1.
- Select Save changes.
- On the saved job card, select Manage perms. Add individual citizens or assign a permission group with Start job access.
- Select the Jobs module's main Save and wait for Settings saved.
The job card shows its name, ID, and Manage perms, Edit, and Delete actions.
Expected result
Eligible members can select the job through /job start. CoreRP privately gives them an assignment and I am here button. After the final location is completed, it credits the payout per pickup multiplied by the number of completed pickups.
Next steps
For a custom route, read Draw an ER:LC job area. Members can then follow Start and complete an ER:LC job.