Configure the CoreRP social network
Configure a Discord channel where members can publish social posts with your server's chosen appearance, requirements, reactions, and comments.
Before you begin
- Complete CoreRP setup.
- You need owner or administrator access to your Discord server in the CoreRP dashboard.
- Create or choose a dedicated text or announcement channel for the social feed.
- Give CoreRP View Channel, Send Messages, and Embed Links so it can publish posts. Manage Messages lets it remove each member's original message after creating the post. Read Message History lets it fetch existing posts for comments.
- Members need an active citizen ID. If you enable Phone required, they also need an item from the Phone category in that citizen's personal inventory.
Configure the channel and appearance
-
Open the CoreRP dashboard and select your Discord server.
-
Open Module settings, then select Social network.
-
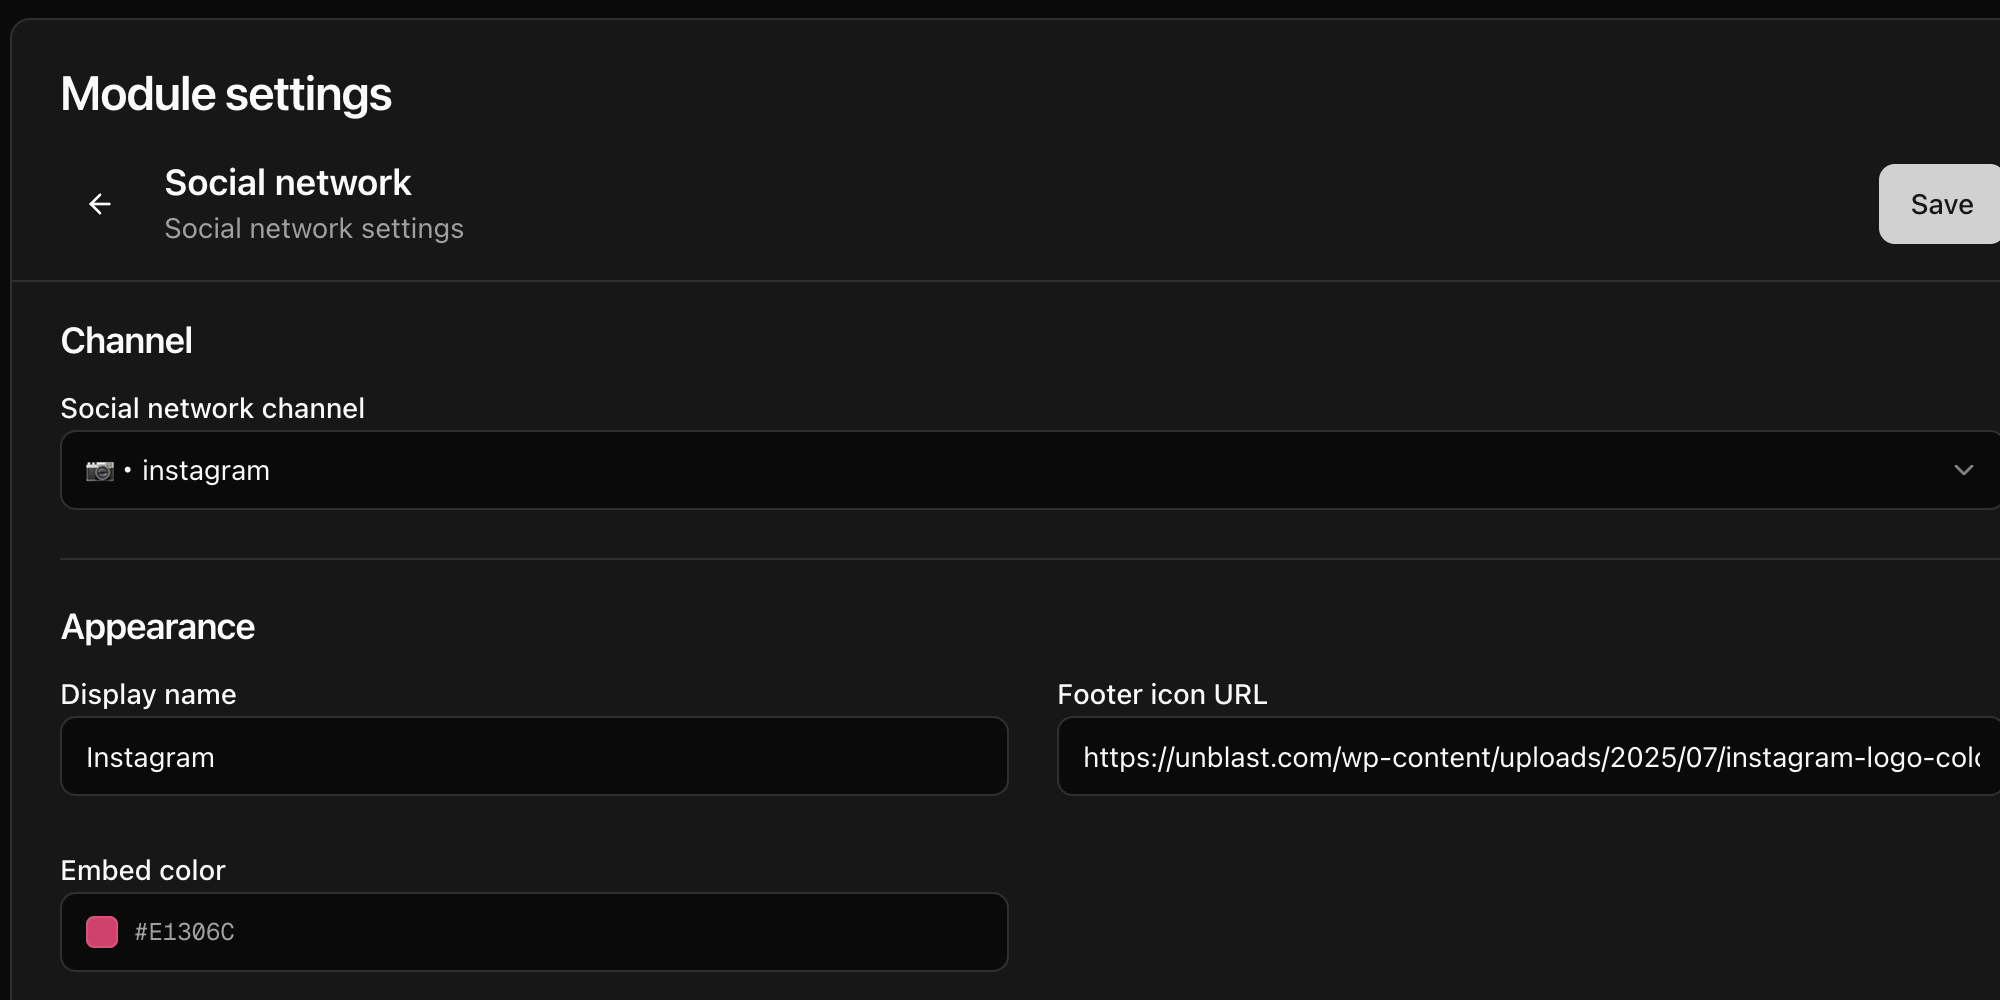
Under Channel, select the Social network channel where members will publish posts.
-
Under Appearance, complete these fields:
- Display name: enter the network name shown in a post's footer. It appears only when Footer icon URL is also set.
- Footer icon URL: enter the public URL of the icon shown beside the footer.
- Embed color: choose the accent color used along the side of each post.
Choose posting and interaction rules
-
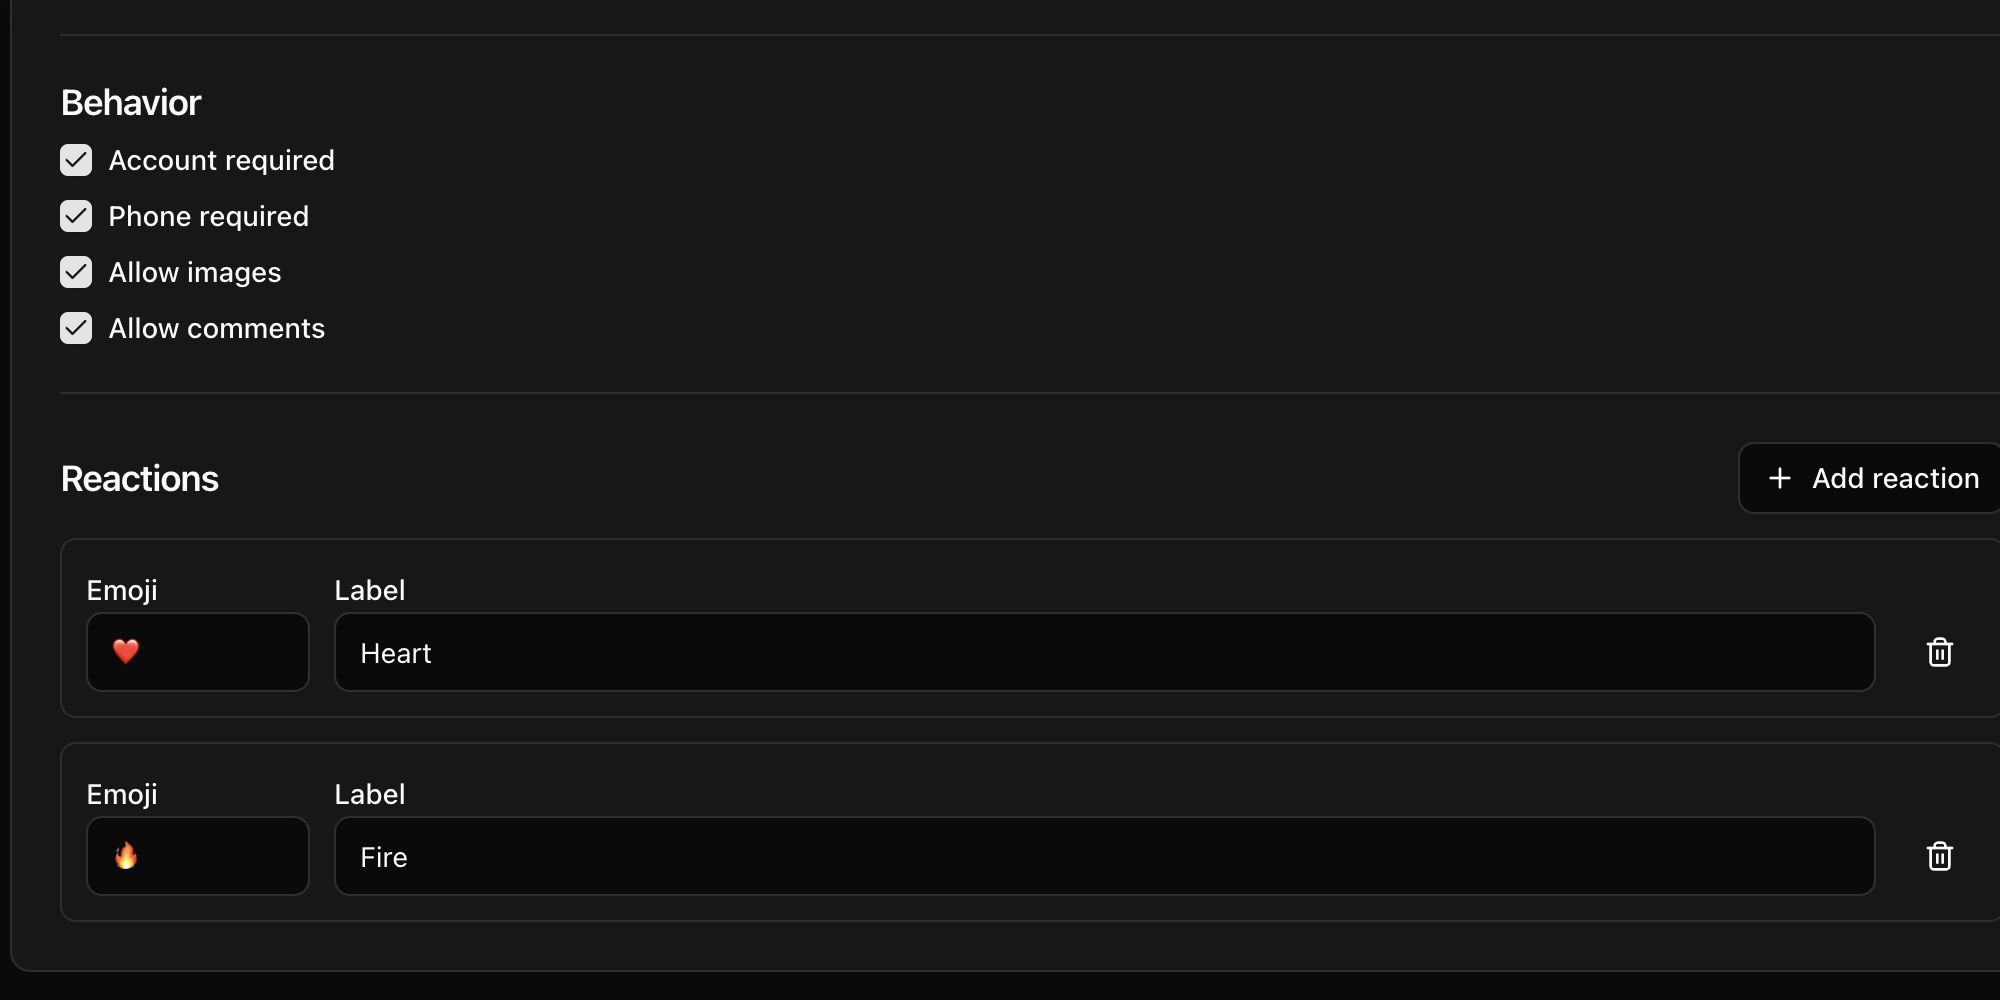
Under Behavior, choose who can post and what posts may contain:
- Account required: require a CoreRP social network account before posting. If disabled, members can post without an account, but they still need an account to react or comment.
- Phone required: require a Phone category item in the active citizen's personal inventory.
- Allow images: allow image attachments in posts. When disabled, CoreRP rejects posts containing an image.
- Allow comments: show the comment control and accept comments. When disabled, members cannot add new comments through existing or new posts.
-
Under Reactions, keep at least one reaction and configure up to four:
- Select Add reaction to add another row.
- Enter the button's Emoji and an identifying Label.
- Select the trash-can Remove reaction button to remove a row.
New posts show the saved reaction buttons. On an existing post, CoreRP accepts only the currently saved reactions, so a removed reaction can no longer be used.
-
Select Save and wait for Settings saved.
-
Refresh the page and confirm that the channel, appearance, behavior, and reactions still show your saved values.
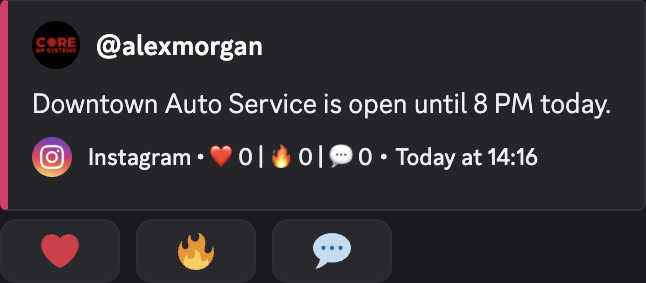
When a member posts in the selected channel, CoreRP publishes it with the saved appearance and interaction controls.
Troubleshooting
- If CoreRP does not convert the message, confirm that it was sent in the saved Social network channel and that the bot has View Channel, Send Messages, and Embed Links there.
- If a comment cannot be submitted on an existing post, give CoreRP Read Message History in the social network channel.
- If the embed appears but the member's original message remains, give the bot Manage Messages in the social network channel.
- If account creation or posting reports that a citizen ID is missing, create or activate the member's citizen ID. If it reports that a phone is missing, add a configured Phone category item to that citizen's personal inventory.
- If the account name is rejected, enter at least one supported character and choose a name that is not already used in the server.
- If an image or comment is rejected, confirm that Allow images or Allow comments is enabled, then save the settings again.
Next steps
Continue with Create a social network account and publish posts, then learn how to comment on and react to social network posts.