Create and configure shops
Create a shop, add items or vehicles, save it safely, and publish its purchasing panel in Discord.
Before you begin
- Complete CoreRP setup, create the inventory items you plan to sell, and configure the CoreRP economy.
- You need owner or administrator access to your Discord server in the CoreRP dashboard.
- Have the existing shop account number or IBAN ready if you plan to route money through it, and synchronize any Discord thread you plan to select.
- To publish a shop panel, you need Discord's Manage Messages permission and access under the server's generic
/adminrules. The bot needs View Channel, Send Messages, and Embed Links in the destination. - In a selected Log thread, CoreRP needs View Channel, Send Messages in Threads, and Embed Links.
Actual purchases and sales require an active citizen ID and primary bank account. Item products use the citizen's personal inventory, while car products use the garage.
Create the shop
-
Open the dashboard, select your Discord server, and go to Module settings → Shops.
-
Select Add shop.
-
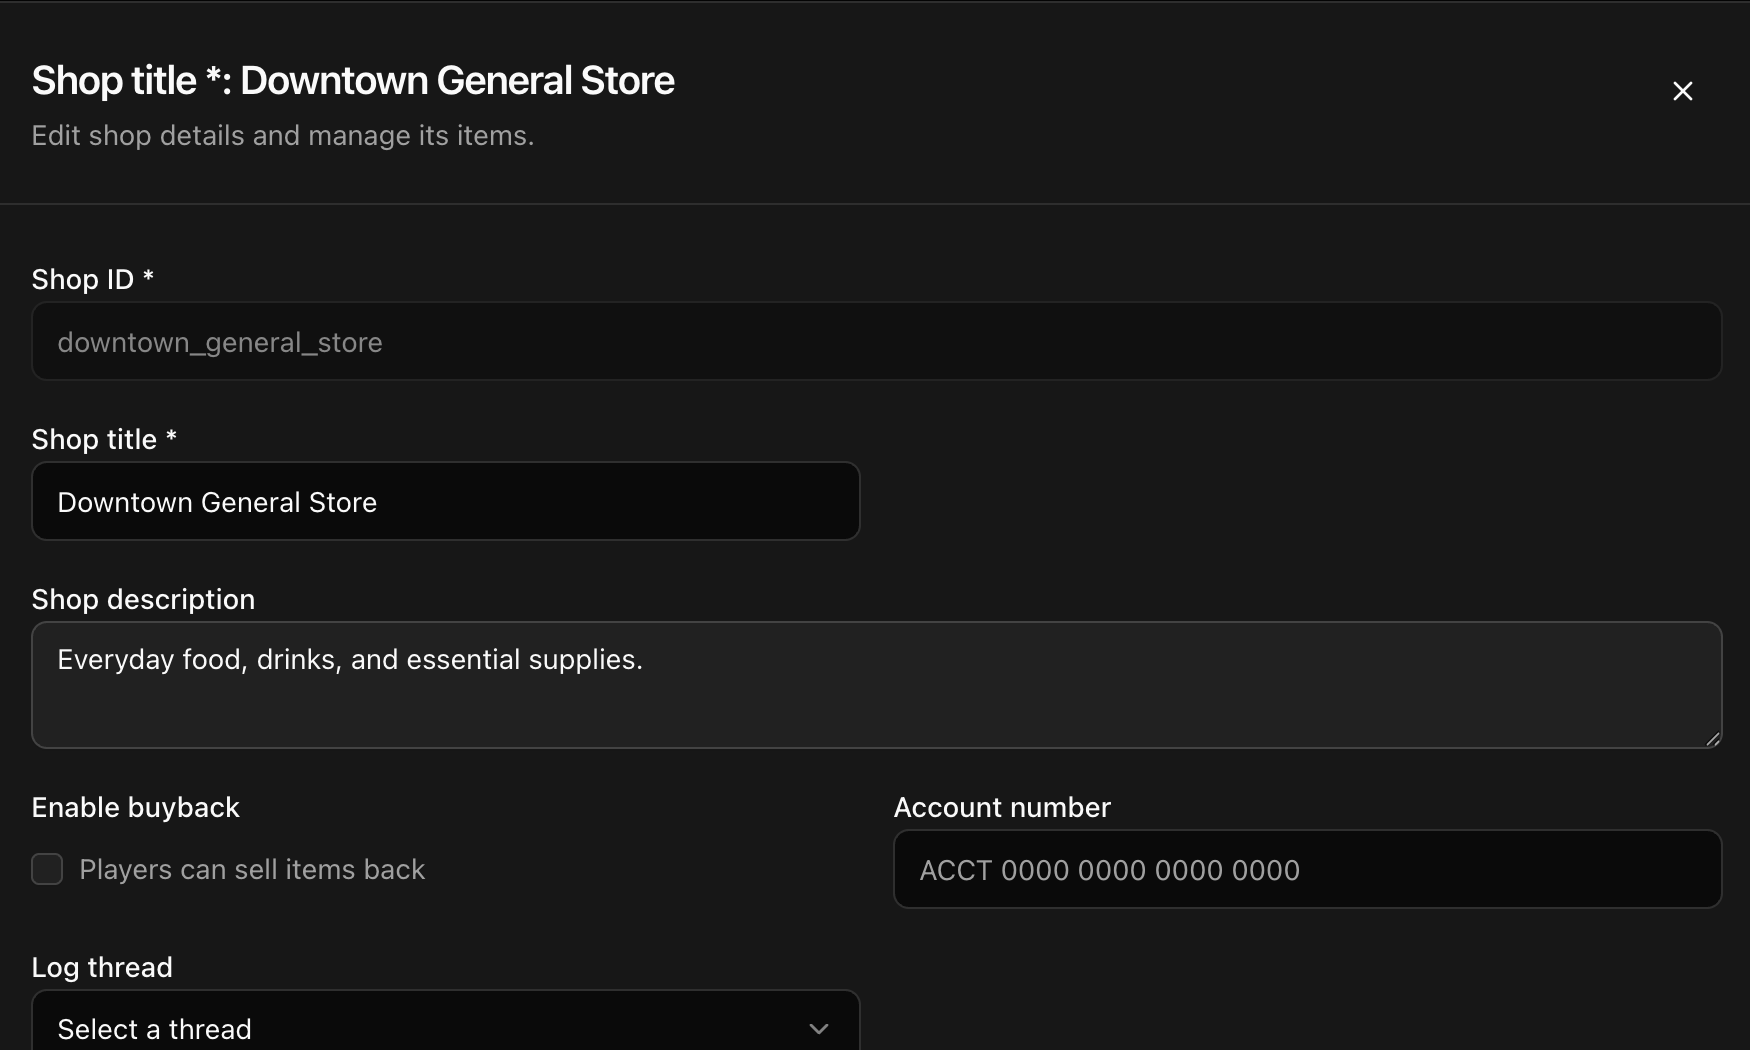
Enter
downtown_general_storeas the unique Shop ID. It cannot be edited after creation. Avoid IDs that differ only by case, spaces, or punctuation because CoreRP treats them as the same ID. -
Enter
Downtown General Storeas the required public Shop title and add a concise public Shop description. -
Configure the transaction routing:
- Enable buyback lets members sell supported inventory items to the shop.
- Account number appears for US profiles; other countries may label it IBAN. When entered, purchases credit this account and buybacks debit it. If left blank, CoreRP still charges or pays the member but does not transfer the other side through a shop account.
- Log thread receives shop transaction logs. CoreRP needs access to the thread and permission to send messages there.
An invalid or unavailable account can prevent a transaction. Buyback also requires the shop account to have enough money when an account is configured. The complete member purchase, sale, inventory, and vehicle flow is covered in Buy and sell items or vehicles in a shop.
- Leave Shop area empty to make the shop work everywhere. An area restriction requires each member to have an active ID with a Roblox name and the server to have an enabled, working ER:LC connection; follow Restrict a shop to an ER:LC map area.
- Choose the Shop color used by its embed and the Discord Button color: Blue, Gray, Green, or Red.
- Select Add shop, then reopen the shop from Shop list to add products.
Add products
-
Under Shop items, select Add item.
-
Configure the product:
- Item name is required. For an Item, use the exact name from your server's item setup; for a Car, enter the vehicle model name CoreRP should create.
- Price is the per-unit amount and cannot be negative. This tutorial uses
2.00for Bottled Water. Discord displays the total as price multiplied by the saved quantity. - Quantity must be at least
1. A value above1opens a Discord quantity prompt with the saved value as its suggestion; the number entered there becomes the transaction quantity. - Product type is Item or Car. Purchased items go to personal inventory; purchased cars are created as unregistered vehicles.
- For an Item, Allow buying multiple lets a member who already owns the item purchase it again. It does not create the quantity prompt and does not affect cars.
- Item description is optional and appears in the public shop panel.
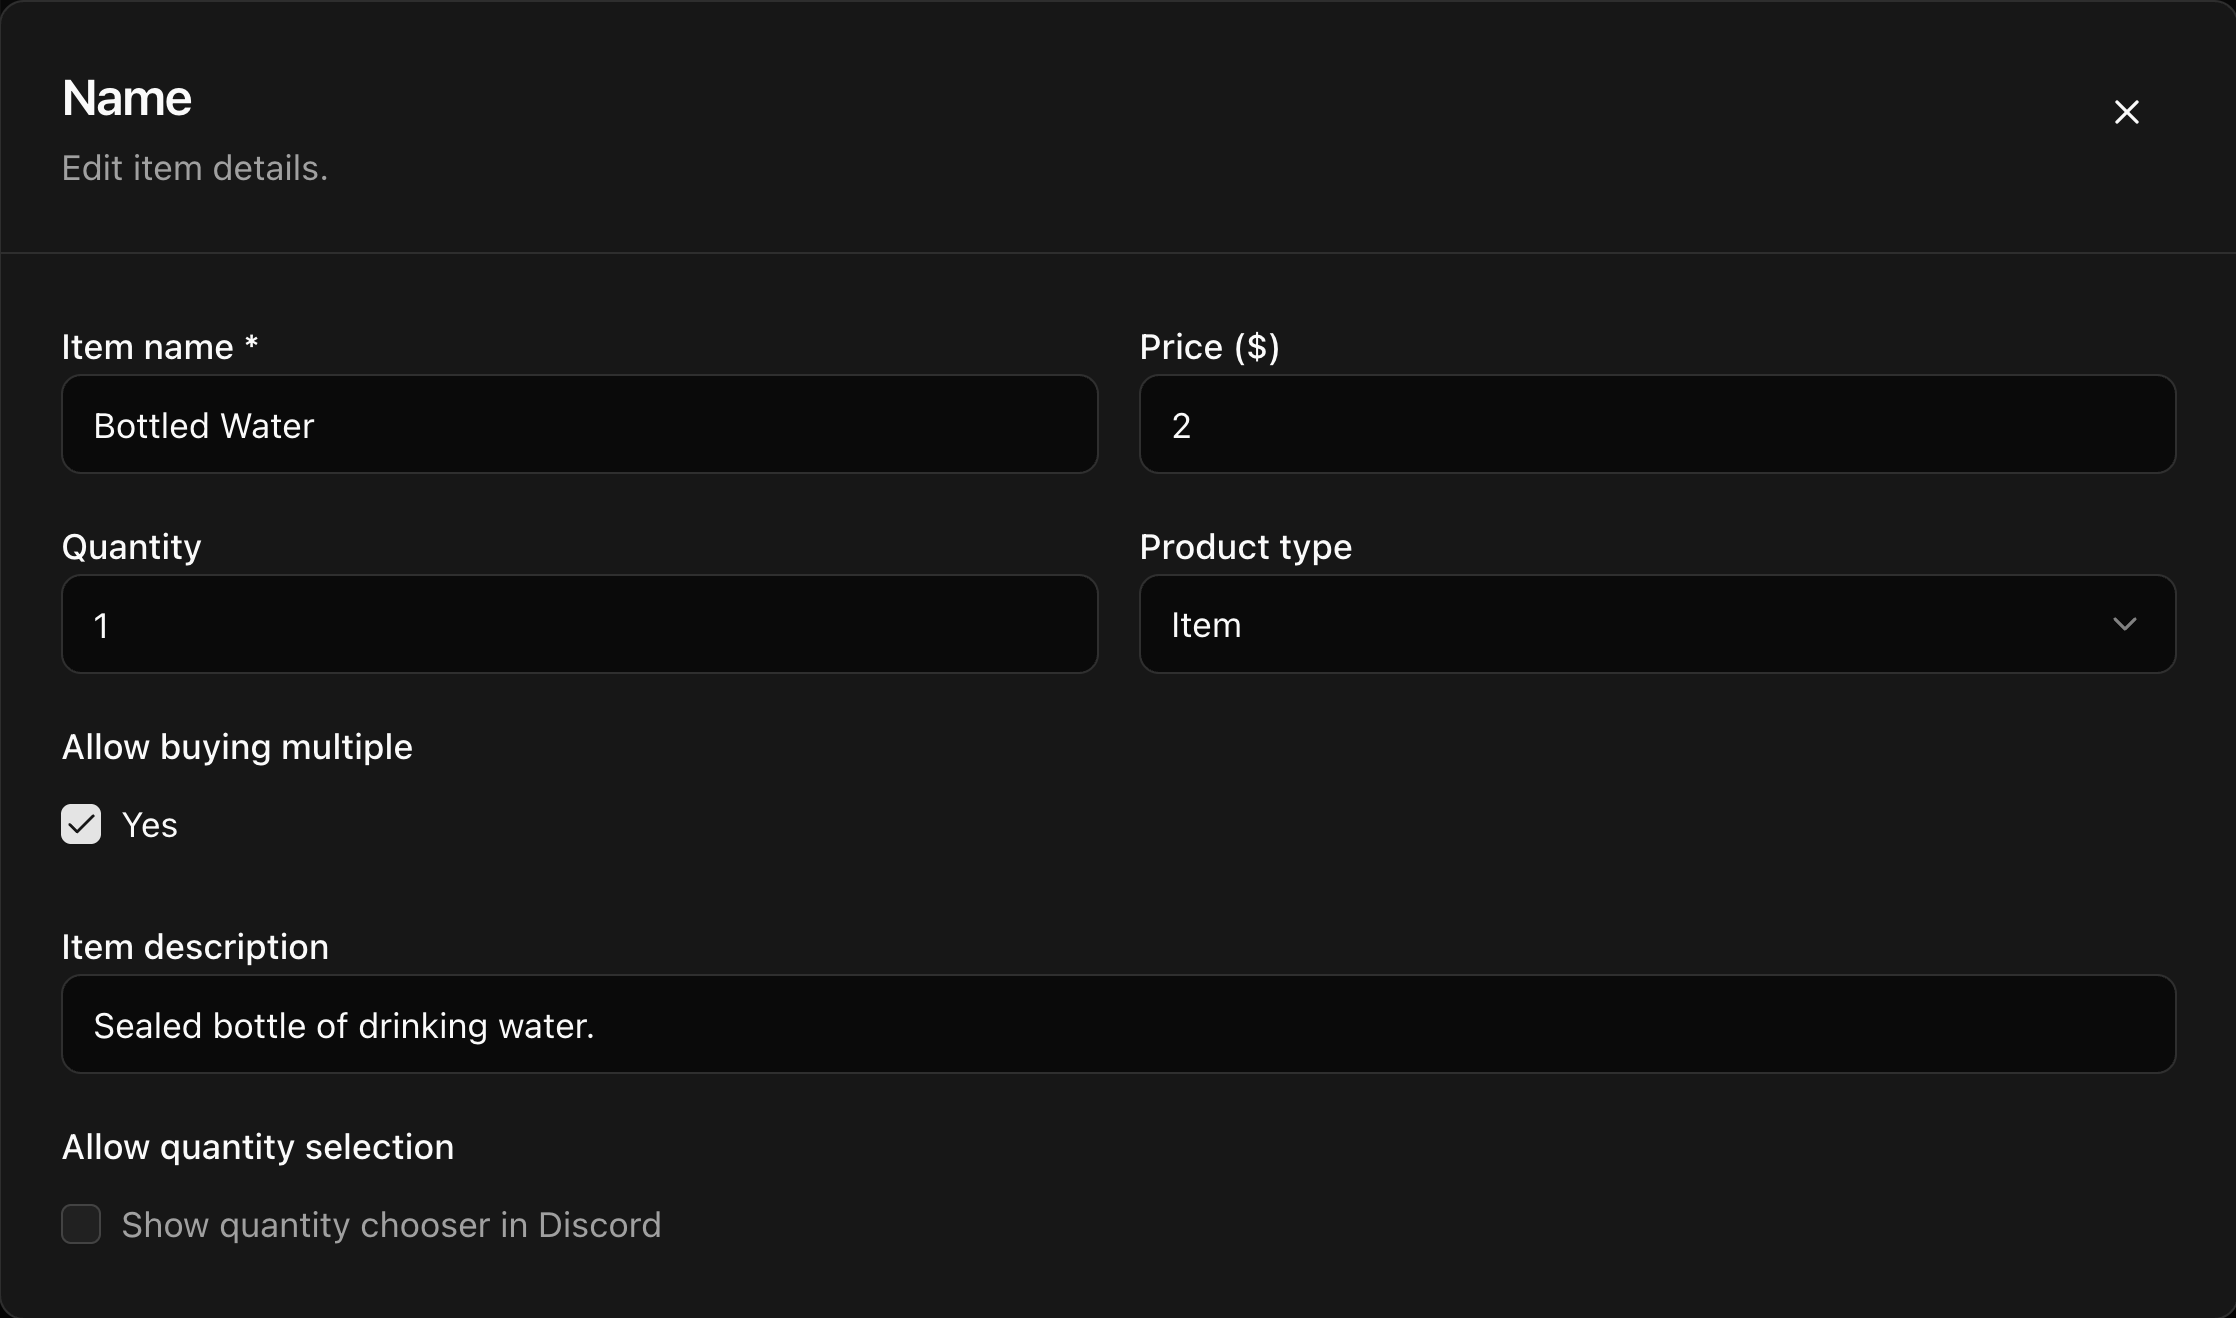
- Select Add item to create the product. When editing an existing product, the submit label is Save changes.
Save and check the shop
- After editing the shop details, select Save changes in the shop editor. This only stages the complete shop in the module.
- Select the module-level Save.
- Refresh the page, reopen the shop, and confirm its details, products, routing, colors, and optional settings are still present.
Delete item and Delete shop ask for confirmation, but their removal is only staged until you select the module-level Save.
Publish the Discord shop panel
Run:
/admin panel panel:Shop channel:[channel]
The panel option is required; select Shop. The channel option is optional and defaults to the channel where you run the command. This command requires Manage Messages and the server's generic /admin access rules; it does not additionally require the configured moderator role. CoreRP privately asks you to choose one of the configured shops, then publishes that shop's public panel in the target channel.
The selector and public controls follow the server's configured shop command-access rules.
After changing the shop or its products, save the settings and publish the panel again.
Troubleshooting
- If the shop is missing after a refresh, confirm that you used both Save changes and the module-level Save.
- If members cannot use a product, check the shop command-access rules, active identity, primary account, funds, and personal inventory.
- If a log does not appear, check that the selected thread still exists and CoreRP can view and send messages in it.
Next steps
Continue with Restrict a shop to an ER:LC map area or Buy and sell items or vehicles in a shop.